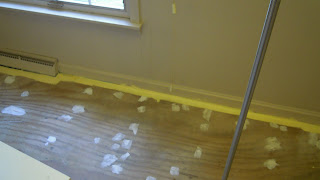
1. Rip out nasty carpet.
2. Pull out all nails and staples. Fill holes and major cracks. (I used dry-wall filler because I had it handy)
3. Begin priming. (I used 2 coats of old semi-gloss I had laying about)
4. Draw your pattern. I scribbled the squares that were to be black, so when I painted the white, I did not get confused.
5. I free handed the white squares first. 2 coats. Then the black (also free handed) 2 coats.
6. I used semi-gloss for the white paint. This room is small-ish and I like the way it reflects light. The black paint is satin. I wanted a bit less shine to "casual" the space up (too much shine on the floor would have looked formal-ish).
7. Now to re-measure and hand paint the green argyle pattern (semi-gloss for a "pop" over the black squares). The green relief color really makes the room more friendly and personal.
Tah-Dah!
I can't wait until you see this all put together!!! The walls are done, the ceiling (other than the beams) is done, and the furniture is back in the room. I am really starting to dig it!

I so dearly love a cottage in winter!
Monday, November 29, 2010
Painting a wood subfloor
Labels:
Art Room,
before and after
A Memo Board
There is a raised provincial pattern in the outer ring and a crown-type raised pattern on the outer edge...hard to see...
And now it is a polka-dot, whimsical memo board for my art room!
Update on said room...have spent approximately 900 hours painting...yesterday I hung the awning striped valance (which is freakishly cute). I got the black trim and crown done too! Soooo whats left? The second half of the window needs to be painted, the beams need to be painted, aaaaan then that wall of shelves needs to be tackled. I would guess that I am about 1/2 way on this "little" project!
Labels:
Art Room,
before and after
Wednesday, November 24, 2010
Art Room Valance Project
We Begin with this old-lady misery!
I have these valances on all of the windows on the main floor of the house. I have recovered some, but with the intricate scalloping on the edge of this, I decided to take a stab at painting it.
I simply applied with a brush.
Two coats of black satin latex paint...allow to dry over night.
The next day it was time to add the white! First, I broke down and used some painters tape (I generally prefer to free-hand, but it has to be exact).
Two coats of white semi-gloss latex....also, dry over night.
Last night I painted the piped edges in green. The same color that is the accent in the art room. I can't wait to see what it looks like on the window!!! To be continued...
Labels:
Art Room,
before and after
Tuesday, November 23, 2010
He said what?
So, I told Sir, that I was thinking about starting a blog...in truth, I have been thinking about it for a couple of years, but it was his response that pushed me forward. Sir had the nerve to state something along the lines of "Why? You really do not have anything to say." Out of this bumbling, stumbling man's mouth I found my inspiration! Welcome!
Labels:
anecdotes
Subscribe to:
Comments (Atom)


