 |
| Easy, no buttons, no zippers...just cute! |
I have a ton of scrap fabric. Literally, boxes. We have a relationship. When I choose each piece of fabric from the thousands available, it is because it speaks to me. I bring it home, wash, iron, create and then, say goodbye???? Not if there are a few inches of my friend left. I put the scraps in a bin for a 'later' project. Well, its later.
Each season I scour the stores looking for the perfect ensembles for Madam Lu. I am always stuck with "I like this plaid, but YORKIES???? Seriously??? We have Dobermans" or "No matter how many bows you put on a monkey, they still throw poop, and I'm not putting her in a monkey dress" or "This looks like it was made for a prostitute back in 1987, um, hello, she's 3". It is always exhausting.
While some see clothing as simply an item of comfort to keep one modest, I see it as frosting on a cake. Yes, a cake would look ridiculous without frosting, so we all frost. But some cakes are smothered in store-bought, oil based, slime in a tub and some cakes are covered in butter-cream, fondant, piping, edible gold, edible flowers, etc. Madam Lu's clothes are all about edible flowers and butter-cream....ha!
So I have scraps and I have a spring that is encroaching on my winter bliss...this means....sewing project.
For all of the moms who delight in things FREE and EASY and exactly your style....I give you the Daisy Scrap Dress....
 |
| I got out my scraps and arranged them by color on the table. About half of them are in the washing machine as of this picture because one of my 'little helper' must have figured out a way to slither her body into the box and had quite a kitty nest...yes, YOU, Miss Melanie. |
 |
| List. I wrote down some ideas of things I could make. |
MAKE SURE TO MEASURE YOUR CHILD and write the measurements down.
 |
| This is one group of fabric. This is all it takes to make a dress. |
 |
| And here is my 'pattern'. Because I don't do buttons or zippers, all of my dresses have adjustable straps. ANYONE can make them! You can put whatever you want on your dress. I just happen to like the flower...even polka dots of different sizes and fabrics would be adorable! |
 |
| Now, for the top of the dress. You need rectangles. Rectangle #1 is the band that goes around her body...the one the straps will be attached to. So, her body is 20" around...the rectangle is 22" long. It is @5" tall. |
 |
| Fold in half. Iron. |
 |
| These little rectangles will make loops on the back. |
 |
| Again, fold in half. Iron. See the back of the bodice with the loops... |
 |
| This shows what the back will look like. |
 |
| And finally, the straps. Again, two matching rectangles @2.5" and these can be as long as you want. You are going to run them through the loops and tie them in a square knot or bow, depending on their length. |
 |
| See how the straps run through the loops and all you have to do is tie them. |
 |
| OK, now for the skirt of the dress. Think 'pillowcase'. Two large rectangles...the same size. |
 |
| I fold my fabric in half to make sure they are the same. |
 |
| Two pieces. |
 |
| I do not have a serger. So all of my seams are a double fold. I spray the fabric (water) fold in about 1/4'. Iron. Fold again. Iron. Do this on 3 sides. Do not do it to the top. |
 |
| Now, sew the sides together. You should have a pillowcase with a rough top. |
 |
| Turn your (2) strap pieces and (2) hook pieces inside out and fold down the middle. Sew along the outer long edge. Then turn them back to the right side. Do not do this to the bodice piece. |
 |
| Sew the bodice to the skirt. You may need to gather your skirt...I use the long stitch method, but some just do it as they sew. |
 |
| Attach straps to the front. Sew. |
 |
| Looking nearly done... |
 |
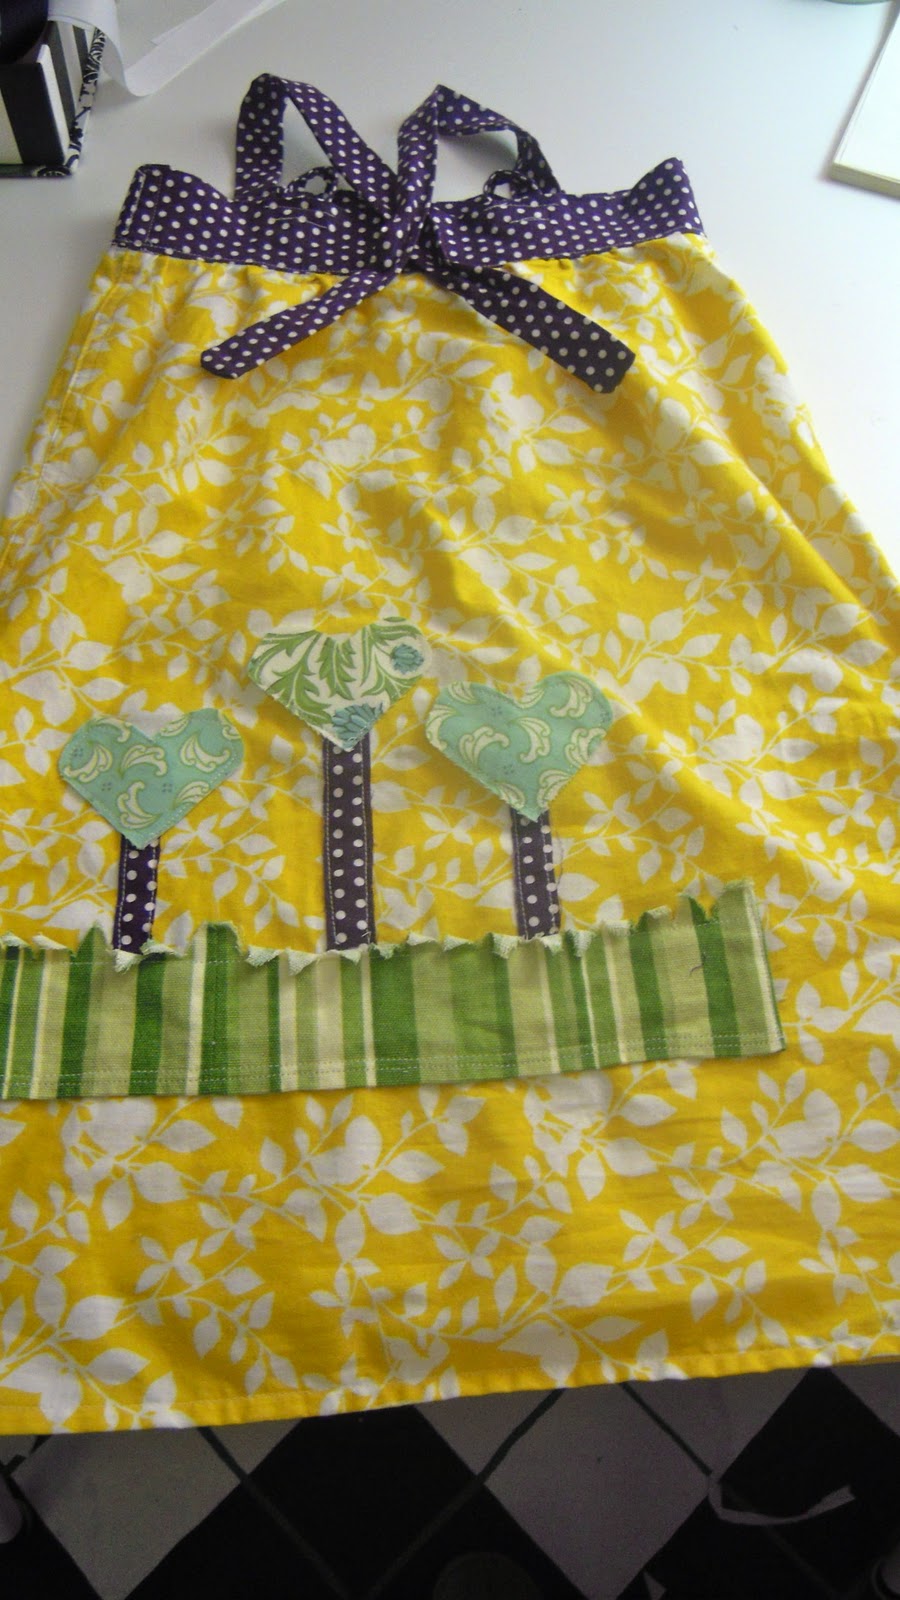
| Attach the back hooks and sew. Run the straps through. The dress is done. You don't even have to embellish it. It makes an adorable, easy, breezy dress. But, if you want to embellish... |
 |
| Applique looks much more difficult than it is. I just draw what I want and then make it happen. The "grass" is hemmed on 3 sides and sewn to the skirt. About half an inch from the top I sewed another seam. I want the top to fray....its grass. |
 |
| Now I cut some triangles out...so it looks more "grassy". |
 |
| And the flower...just draw a petal onto a piece of cereal box cardboard. Trace it onto the back of the fabric. Cut a stem, leaf, and circle. Pin it all where you want it and sew it on...1/4" away from the edges. The edges will fray to the seam and it will be adorable. |
 |
| Cute! Time: About 4 hours from design on paper to finished. Cost: FREE |
 |
| I had the grass wrap around to the back on one side. I ALWAYS put something on the back...but you don't have to! |
Tah-Dah. It is a little long on her now, but spring is still months away and summer even longer...
I hope you are inspired!


I envy your talent.
ReplyDeleteLove the dress, and Madam Lu is adorable.
Shucks! She is a beast, but we figure after this long, we'll keep her anyways! Smirking....
ReplyDeleteLove it all! I will eventually hone these skills, my friend! Great stuff!
ReplyDeleteThanks, Rachel!!! And you totally will! Love you!
ReplyDelete